Apple’s Time Machine is an invaluable tool for Mac users, offering seamless and automated backup solutions to protect your data. By configuring it effectively, you ensure your files are safe, while also optimising system performance. This guide will walk you through the setup process for achieving maximum backup efficiency. Whether you are a seasoned user or new to macOS, understanding how to set up Time Machine properly is crucial for long-term data security.
Understanding Time Machine and Its Benefits
Time Machine, an inbuilt macOS feature, simplifies the process of creating backups for your Mac. Unlike manual backup methods, it offers incremental backups, ensuring minimal storage usage and consistent data protection. Designed with user convenience in mind, Time Machine works in the background without interfering with your daily tasks. This level of integration ensures that your data is always protected without requiring constant oversight.
One of the standout features of Time Machine is its ability to create hourly, daily, and weekly backups. These incremental backups only save changes made since the last backup, which reduces the amount of storage required. This means you can maintain a robust archive of your files without needing excessive space. Moreover, Time Machine is versatile, working seamlessly with various external storage devices.
For users who frequently update their files, the ability to restore specific versions is invaluable. Whether you need to recover an earlier draft of a document or restore photos accidentally deleted from your library, Time Machine ensures peace of mind with minimal effort.
Choosing the Right External Storage
The efficiency of Time Machine heavily depends on the external storage device you select. This choice can influence the speed, reliability, and overall backup performance. For optimal results, choose a device with sufficient capacity to accommodate your Mac’s data over time. A general rule of thumb is to select a drive with at least twice the storage capacity of your Mac’s internal drive.
Storage speed is equally important. Solid State Drives (SSDs) are recommended for their faster read and write speeds compared to traditional Hard Disk Drives (HDDs). Additionally, compatibility with macOS is crucial. Ensure that the drive supports file systems like APFS or Mac OS Extended (Journaled). Drives pre-formatted for Windows systems will need reformatting before use with Time Machine.
When selecting a connection method, options like USB-C or Thunderbolt provide faster data transfer rates compared to traditional USB connections. For those using a network drive, ensure that it is compatible with Time Machine backups and has a stable connection to avoid interruptions.
Setting Up Time Machine for Maximum Efficiency
Once your external storage is ready, follow these steps to configure Time Machine effectively. A well-configured setup ensures consistent backups without unnecessary resource usage. By tailoring the settings to your needs, you can strike a balance between data security and system performance.
Activating Time Machine
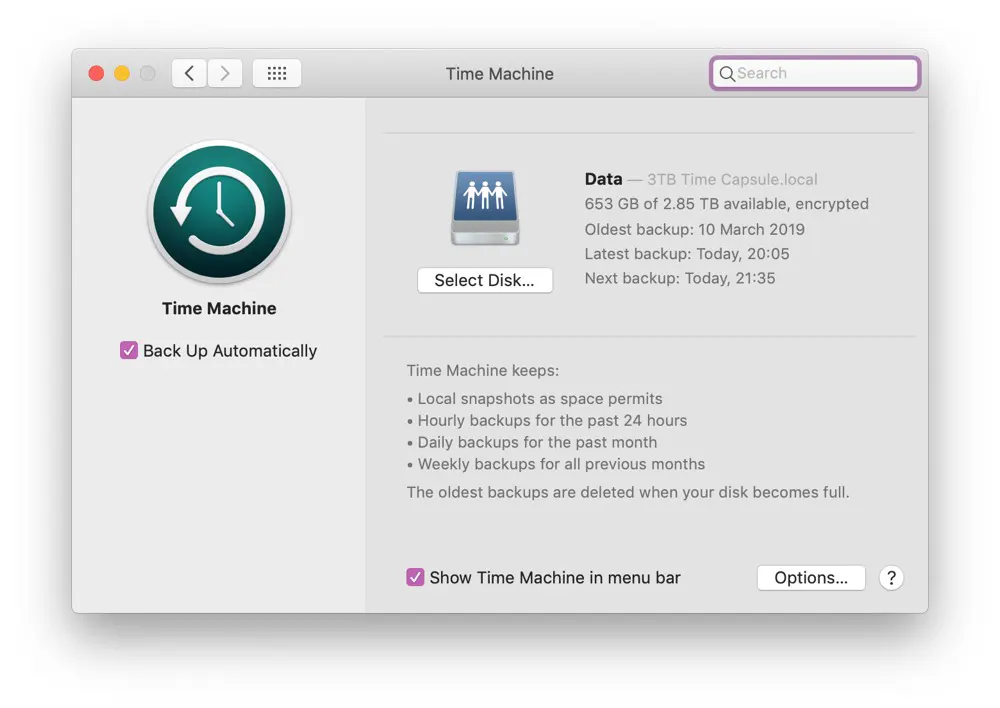
1. Navigate to System Preferences and select Time Machine. Here, you will find an intuitive interface designed for quick setup.
2. Click on “Select Backup Disk” and choose your prepared drive from the list. This step ensures that Time Machine uses the correct storage for its backups.
3. Enable “Back Up Automatically” to initiate scheduled backups. Time Machine will now create hourly backups of any changes, daily backups for the past month, and weekly backups for older data.
To optimise your backup process, consider excluding unnecessary files. Use the “Options” menu to add specific folders or file types to the exclusion list. This saves space on your backup drive and speeds up the backup process, especially for users with large media libraries or redundant data.

Maintaining Your Time Machine Setup
After setting up Time Machine, it is essential to perform regular checks to ensure its efficiency. A well-maintained backup system is less prone to errors and ensures that your data remains secure over time. These maintenance practices can also extend the lifespan of your external storage device.
Monitoring Backup Status
Time Machine provides a status indicator in the menu bar for easy monitoring. This indicator allows you to quickly verify that backups are completed successfully. If backups fail, check your external drive connection or review system logs for detailed error information.
Testing your backups periodically is a good habit. Restoring individual files or entire folders confirms the reliability of your backups. Regularly update your macOS and Time Machine software to ensure compatibility with new features and security updates. Additionally, consider rotating your backup drives if you rely on multiple devices for added redundancy.
By following these steps and maintaining a proactive approach to backups, you can ensure that Time Machine remains a reliable safeguard for your most important data. With its user-friendly interface and robust features, Time Machine continues to be a trusted solution for Mac users worldwide.


